Location services use up not only battery but also mobile data, so
turning it off would be a good idea for saving both of these precious
resources. Location services is found in the settings and if you aren’t
willing to part with this feature, you can select the Power saving
location service mode that will only use this feature when using Wi-Fi
and mobile networks, instead of the default high accuracy mode which
uses GPS, Wi-Fi and mobile networks.
The Samsung Galaxy Note 4 has a great quick setting menu that you get
to by swiping down from the top of the screen with two fingers. There
you’ll find a bunch of toggles that you can easily switch on or off with
a tap. They aren’t in alphabetical order so you’ll have to look around
for the various services: turn off Bluetooth, NFC, and GPS if you don’t
need them.
Your Android phone is many things: one of your most precious possessions, a statement of who you are, and maybe even the place where you keep your secrets. And yet many of us don’t protect our phones properly, or we do daft things that could do serious damage to our data or our reputations. What shouldn’t you do with your smartphone?
According to Paul Simon there are fifty ways to leave your lover, including “hop on the bus, Gus” and “make a new plan, Stan”. What would the list be like if he were singing about phones rather than partners? Would his Android anthem include such advice as “don’t forget to lock the screen, Gene”? Er, probably not, and it’d probably be rubbish - but that doesn’t mean there isn’t a sensible list of things you really shouldn’t do with your smartphone. Here are some of our favourites.
The more we do on our phones, the more damage someone can do if they can get access to it - and one of the simplest ways to secure your phone is to lock it. There’s no shortage of great lockscreen apps on Android, and many of them add useful features as well as security.
Remember to update, Kate
It can be hard keeping tabs on which devices get Android updates, but it’s worth paying attention: each new version of Android is mightier than the last. Google Play Services keep the guts of your device current, but the big updates can make your phone feel brand new all over again.
Chargers are not created equal: plugging your phone into your computer’s USB port doesn’t deliver as much juice as when you use a dedicated charger.
Don’t forget to back it up, Chuck
Your life is on your phone. Imagine how you’d feel if you lost the device and it took all your precious photos and top secret world domination plans with it. Backing up isn’t hard, and it’s a very necessary thing to do. As our Kris puts it, “getting good backup habits is like having good dental habits. It may not be the sexiest activity, but the alternative is far worse.”
Don’t store it all online, Caroline
Kris again: “If something happens to your cloud provider, what happens to your data? When MegaUpload shut down a while back there was a whole lot of uploaded data that simply vanished into thin air.” Cloud storage is a great thing, but whether data is in your device or on a faraway server if it matters to you, you should ensure that there’s more than one copy of it in circulation.
We’ve seen stacks of stories about exploding Android phones, and while the culprit is usually a badly made no-name knock-off battery or charger there are still charging issues you should consider. It’s a very bad idea to leave your phone somewhere warm when it’s charging, regularly letting your battery run to nearly zero is bad for its longevity and you should disconnect it when it’s fully charged.
Don’t leave the screen exposed, Jose
Gorilla Glass is great, but it can only do so much: while it takes a lot to break or seriously damage a smartphone screen, it also takes a lot of money to replace one if it does get damaged. Screen protectors and cases are a kind of gadget insurance: they’re worth buying because the potential costs of not using them are enormous.
Don’t leave it in the rain, Jane
Sony Xperia Z3 users can skip this one, because their phones are dishwasher-proof, but if your phone isn’t waterproof then dampness and extreme humidity are to your phone what sunlight and stakes are to Dracula. Water damage is one of the most common kinds of smartphone damage [http://www.androidpit.com/smartphones-dropped-in-toilet-buy-xperia-z3-or-galaxy-active], and even water resistant devices can only stay submerged for so long.
Everybody loves taking selfies, but if your shots are of the, ahem, intimate variety then it’s a very good idea to ensure they’re not in your photo gallery when you pass the phone to a friend, employer or church minister.
Don’t buy it on a plan, Jan
The worst way to buy a cutting-edge smartphone is on a monthly contract: as we discovered with theMoto X 2014, there’s a good chance of massive discounts within a few months of launch. The combination of SIM-only contracts and a little patience pays dividends.
Don’t let them see your tracks, Jack
If you’ve been using your phone to look at things you shouldn’t, such as, er, top-secret Christmas shopping you’ve been doing, you really don’t want anybody else to see the endless pages of red hot wrapping paper and saucy kindling that you’ve been looking at. The good news is that clearing your browsing history couldn’t be easier.
Almost all mobile malware targets Android - and in particular, it targets Android users who don’t pay attention to what they’re downloading and who frequent less reputable sources of apps. If you’re sideloading apps from Pirate Pete’s World of Warez, you’re asking for trouble.
What do you think? Are there any smartphone no-nos we've missed?
Android 5.0 Lollipop has been available as an OTA update for a number of devices for a few days now. Devices like the Nexus 5, Moto X and LG G3 already have access to the OTA update, and many more handsets are in line to receive it. But a change to the way the update process works means that for phones and tablets that have been modified, the OTA update will not work.
The update script used to upgrade from one version of Android to another has been changed. Now, rather than checking and updating individual files, the script looks at a device's system partition as a whole. This, as Android Police points out, means that anyone who has rooted or modified their Android phone or tablet in any way will find that the OTA update will fail.
However, this does not mean that all is lost. While slightly annoying, if you have modified your system partition all you need to do is reflash your device with a stock Android image. With this done you can then reattempt the OTA update and it should be successful.
Another option is to manually upgrade to Lolliop. Factory images for Android 5.0 Lollipop are available for some Nexus devices – we've looked at how you can install the update on a Nexus 5 and how to upgrade a Nexus 7 – and images will be made available for other handsets in the coming weeks and months.
Did you run into problems performing an OTA upgrade
On November 13th, CyanogenMod posted details of the latest CM 11 M12 build. As oyou may recall, monthly builds have replaced the stable releases, so if you've been holding out there's no need. The CM 11 M12 build is all about stability and bug fixes with additional support for dual-SIM devices. In case you're into details, the M12 build also ''incorporates the upstream Google patches against last months POODLE vulnerability in SSLv3''. I have no idea what that was all about, but if you want to know more you can head over to Google's Security Blog.
CyanogenMod: CM 11 M11 release
Among the many additions, support for certain version of the Galaxy S4 and Galaxy S5 are sure to please most fans, along with the improved shutter speeds. Here is a look at some of the most noteworthy changes:
New Devices: Galaxy S4 Active (jactivelte), Galaxy S4 SK I-9506 (ks01lte), Galaxy S5 GSM (klte), Galaxy Tab 10.1 (picassowifi), Galaxy Player 4.0 (ypg1)
Frameworks & Core Apps: CAF and other upstream updates
Lockscreen: Do not play sounds while a phone call is active & MSIM updates
Frameworks: Add base & MSIM APIs for SEEK (Secure Element Evaluation Kit) support
Frameworks: Fix volume button changing two ‘steps’ per click
Frameworks: Add ‘Screen Off’ action for double-tap/long-press configuration options
Show devices connected to your Wi-Fi (tethering) Hotspot
Fix bug related to ‘switch to last app’ action while in Recents view
Fix Navigation Bar arrow keys in RTL locales
Translations updates from CyanogenMod CrowdIn team
Adjustments to ‘Glove Mode’ (High Touch Sensitivity)
Camera: Add support for all available Slow Shutter speeds (hardware dependent); Improve shutter button
Dialer/InCallUI: Fix smartcover always showing answer fragment
LG G2: Address GPS and NFC issues
Base support for HTC Desire 816 & HTC One Mini 2 (pending nightlies)
We recently learned that the CyanogenMod owners had said no to a Google buyout. Whatever the exact reason, we’re pleased to see them continuing to produce quality free content for Android fans. The CyanogenMod ROM has become a favorite among Android users, gathering a dedicated fan following thanks to its regular updates and excellent interface. If you're hungry for the update, head over to the CyanogenMod website to check it out. So that's what's up. If you want some further reading, you can check out our article on how to get CyanogenMod themes on the Nexus 5, or how to root your device without voiding the warranty. Have you installed the latest CyanogenMod 11.0 build yet?
Each Android user has probably experienced the Google Play Store
suddenly crashing and burning. Whether you get an error message when
downloading apps or the Play Store just doesn’t work when you launch,
it’s all just really annoying. Here are some tips that will get the
Google Play Store working on your phone. Here is what to do when the Play Store isn't working. @ ANDROIDPIT
If the first tip didn’t work, then you can try deleting the data from
the Play Store. This pretty much sets the app back to square one and
gets rid of a lot of saved information. The option is again found by
following the same route as above, but this time you tap on ‘Delete
Data’.
3. Uninstall Play Store updates
Even this can help. Sometimes an update will get Google Play all out
of whack, so it makes sense to uninstall an update, which you do by
going into the settings, search for Google Play Store and press the
button that says ‘Uninstall Updates’. This will revert Google Play back
to the original version as it appeared when it was first installed on
your device.
If you have deactivated the Download Manager, Google Play won’t work
anymore. To get it back, go to Settings, then App Manager (or
equivalent) and all apps. Search for Download Manager and tap on the
activate button. However, if this button says deactivate, no worries,
this means that the Download Manager is already active.
When I hear criticisms of the HTC One (M8),
they are usually one of the following four gripes: too heavy, bad
camera, don't like metal, too expensive. But what if you could have a
lighter, cheaper, plastic M8 with a ''normal'' camera? Well, that's
exactly what HTC built. Check out our HTC One (E8) review to see if it's a better One (M8).
This is where the One (E8) sets itself apart from its metallic
brother: the HTC One (E8) camera replaces the much-maligned Duo Camera
with 4 UltraPixel resolution for a 13 MP regular megapixel camera.
Compared to the One (M8) this is the where the One (E8) places its bets.
Sure, you'll miss out on post-focus action, but who really cares when
you can install the Google Camera anyway. So how does it stack up? Pretty good, but not so good it'll knock your socks off. Take a look at the test photos:
So let's take a look at everything:
the One (E8) is lighter, it's less expensive than the One (M8), it has
better shock absorbency from the material choice (even if it doesn't
look quite as nice as the flagship, in my opinion), and it even has a
slightly upgraded CPU. But what about the biggest drawcard of all: the
camera? Sadly, that's not quite up to snuff.
To have a cheaper, lighter equivalent to the M8 with a plastic build
is a good thing, don't get me wrong, but it's a shame that the
uninspiring UltraPixel camera was replaced with an equally uninspiring
regular camera (the same one found on the HTC One mini 2).
All things considered, it's by no means a bad phone - in fact it's a
great phone. But just like the One (M8) I find the camera being the
biggest let down. Still, it's 100 USD cheaper than the One (M8). In any
case, this commitment to diversification on HTC's part can only be a
good thing, and I look forward to the One (E9) just as much as the HTC One (M9).
So,That's it for now.Thank you.
Android 5.0 Lolipop announced Google.This updated version of the Android operating system from 3 November has started a worldwide organization.
As a special feature on the Android 5.0 version includes new material design philosophy lollipops.Lalipape designs or patterns on the importance of being open to update it to the world today.
After Ice Cream Sandwich, Google's new operating system brings a huge change.Google's commentary about the OS, the new user interface has been designed lalipape material.In addition to the lock screen and notifications menu have been improved.The new version of অ্যান্ড্রয়েডচালিত prolonged battery life and performance will improve.
Lollipops or Android 5.0 operating system, and users can use the device with the customization facility has been made. '
lollipops facility pictures from any Android device, app or other অ্যান্ড্রয়েডচালিত immediately Topics Recent search the device can be enjoyed.
New in this version Bengali as well as more new languages will support 14 languages.
They are not willing to wait longer to get those lollipops from their mobile phone #Settingscan go on.From there #About Phone System and Check #Lolipop update Now you can click on.
LG has not yet said its last word on mobile photography.
The South Korean manufacturer has always attached great importance to the photographic solutions for their smartphones.Enough to mention here that the LG G3 is equipped with a 13-megapixel camera with optical image stabilization and a unique laser autofocus, which allows instant focus.What can we expect from the upcoming handsets?
The fair Korea Electronics Show, the giant unveiledan original camera with a sensor resolution of 20.7 megapixels and Optical Image Stabilizer.For now, only saw the light of day the module itself, but it is not difficult to guess that next year will see him amongon boardLG G4.
The matrix of such high resolution will allow you to record up to 7 million pixels more than is the case with the current flagship smartphone, so we can expect that taken with the new camera, images will be characterized by above-average detail.I do not know about you, but I already can not wait for its market debut.
High resolution, high contrast, lifetime up to 30 thousand.hours and the large size of the image - the possibility of weighing only 430 g portable projector from LG.
Coming soon to stores around the world willLG HD MiniBeam, which is a small, but extremely efficient projector with a length of 113 mm, a width of 85 mm and a height of 64 mm.The device is capable of displaying a resolutionof 1280 × 720 pixelsand a maximum size of100 inchesfrom a distance of 3.75 m. The contrast ratio is100 000: 1for HD.
Shelf life of the projection image corresponding to the RGB LEDs LEDis equal to 10 years', and that's assuming that the projector will work for eight hours per day.Users will be free to use the AC adapter or battery with a capacity of3000 mAh, which can operate continuously for two and a half hours on a single charge.
Operating the projector is affordable thanks to the copyright system,Auto Vertical Keystone LG, which eliminates the need for self-adjusting lens.MiniBeamcan connect to your smartphone, laptop, tablet or other devices using the USB input.All this makes the new LG projector can be used both for entertainment and for official business presentations.
Even in October, the device will hit the markets in America, Asia and the Middle East, and in November will appear in selected European countries.
Offer LG has just been extended with two new models.What they have to offer?
LG G2 Lite
LG G2 Liteis a weaker variant of last year's flagship, the design also draws extensively on the LG G3.On board you will find4.5-inch IPS screenwith a resolution of800 x 480, across which the density of pixels is207 dpi.His heart is supported by1 GB of RAMQualcomm processor with four cores clocked at 1.2 GHz.
LG G2 Lite
Technical specification complement4GB of internal memory expandablecamera8 megapixels, front webcamVGA,FM radioand battery with a capacity of1820 mAh, which should ensure a long operation time on a single charge.The whole is runningAndroid 4.4 KitKat, which has been enriched with a handful of flagship LG functions such asKnock CodeorQuick Selfie.
For now, the phone is only availablein Brazil, where it was priced at the equivalent of830 zł.
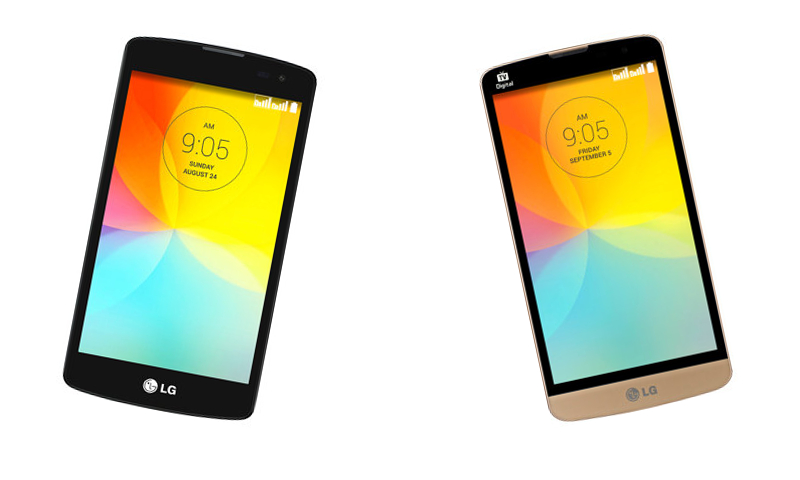
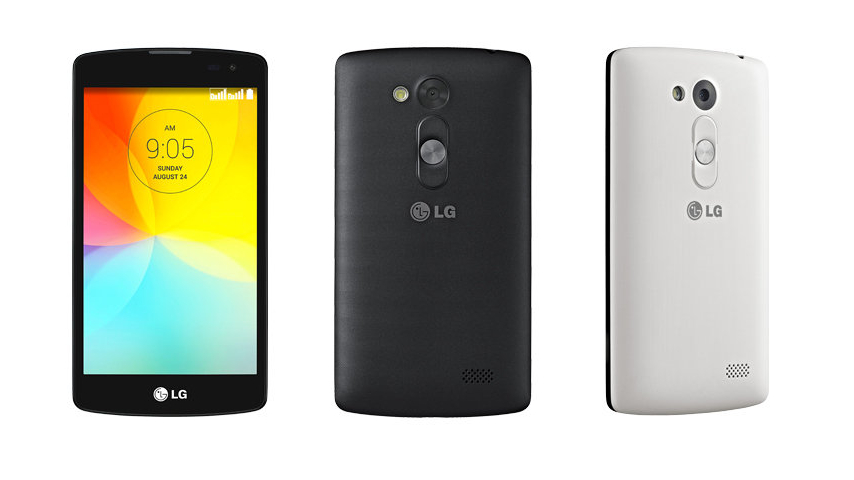
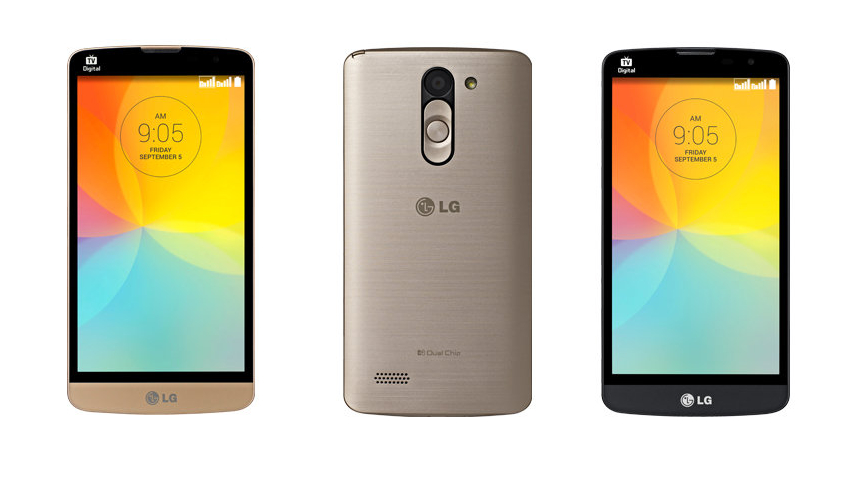
LG L Prime
L Prime is a proposal for lovers of larger displays, because of itsIPS panel with a resolution of 800 x 480 has a 5-inch diagonal.
LG L Prime
The rest of the specifications presented in the same way and includes czterordzeniowy processor with 1.3 GHz,1 GB RAM,8 GB of internal memory, card slotmicroSD, camera8 megapixels,FM radioand a battery2460 mAh.An interesting addition is the built-inTV tuner, which in the Brazilian market is the solution to enjoying considerable popularity.